AdsPower
Last updated
Was this helpful?

Last updated
Was this helpful?
Getting Started with AdsPower
Before you get started, you need to create a PIA S5 Proxy and AdsPower account, which you can do here:
After that, download the AdsPower app, which you can do here:
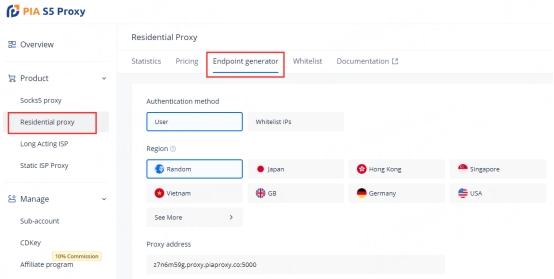
Get the integrated IP address
If you have already purchased a residential proxy, you can get the proxy IP in the Endpoint Generator section of the Personal Center
We support authentication of residential proxies by user & pass or IP whitelist.
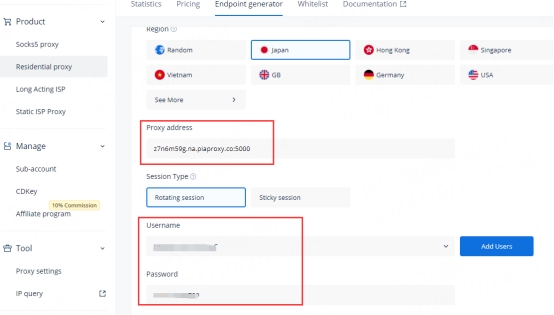
User&pass authentication: When you choose this authentication method, you need to fill in the obtained proxy address, sub-account username and password when configuring the proxy.
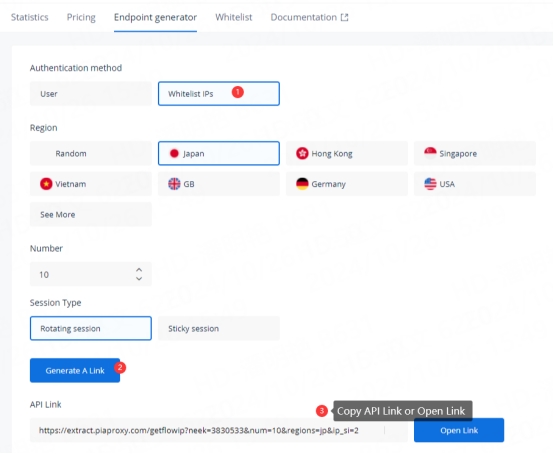
IP whitelist: When you choose this authentication method, you can fill in the API link or get the IP address and port by opening the link when configuring the proxy.
Please select the authentication method, proxy region, session type, etc. according to your business needs, and then you will see the list of available endpoints that have been generated! Next, open the AdsPower application.
AdsPower Settings
1. Click the "New Profile" button in the main screen to enter the profile settings page.
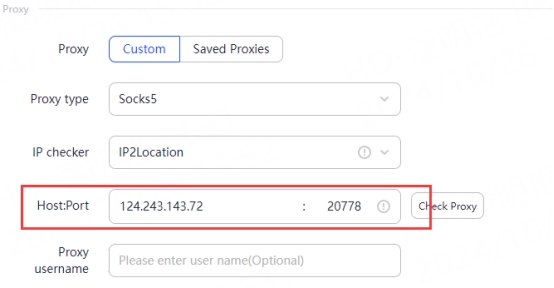
2. Under Proxy Type, select HTTP(S)/SOCKS5. Fill in the details:
Proxy Type: HTTP(S)/SOCKS5
Proxy Host: ffsncb0z.proxy.piaproxy.co
Proxy Port: 5000
Proxy Username: username
Proxy Password: password
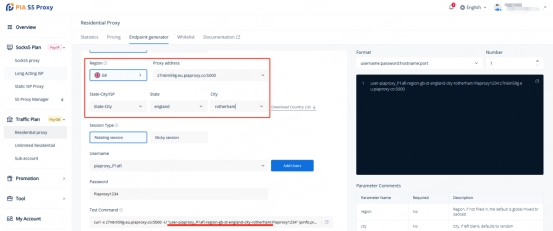
Tip: If you select a fixed country: such as the United States, State-City/ISP, City-- Region---;
Your code configuration needs to be extracted in the test command, such as: curl -x ffsncb0z.na.piaproxy.co:5000 -U "user-piaproxy1_J8xrB-region-us-st-alabama-city-decatur:Piaproxy****" ipinfo.piaproxy.pro
Proxy host: ffsncb0z.na.piaproxy.co
Proxy port: 5000
Proxy username: user-piaproxy1_J8xrB-region-us-st-alabama-city-decatur;
[where region-us-st-alabama-city-decatur: the country you choose. You can edit the country code to use IPs from different countries. ]
Proxy password: Piaproxy****
You can get the IP address of the country you need.
3.2 IP Whitelist: Fill in the text fields of Proxy Host and Proxy Port as shown below
4. Click the "Check Proxy" button to check if the proxy is working properly
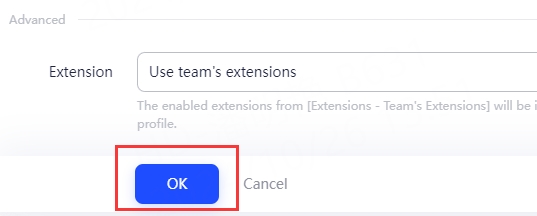
5. After the settings are completed, click the "OK" button at the bottom of the window to save the profile settings.
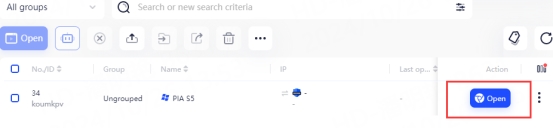
6. In the "Profile Management" tab, you will see the profile you created. Press the "Open" button to launch the browser profile.