
Dolphin{anty}
Getting Started with Dolphin{anty}
Before you get started, you need to create a PIA S5 Proxy and Dolphin{anty}account, which you can do here:
After that, download the Dolphin{anty} app, which you can do here:
Get the Integrated IP Address
If you have already purchased a residential proxy, you can get the proxy IP in the Residential Proxy-Endpoint Generator section of the Personal Center
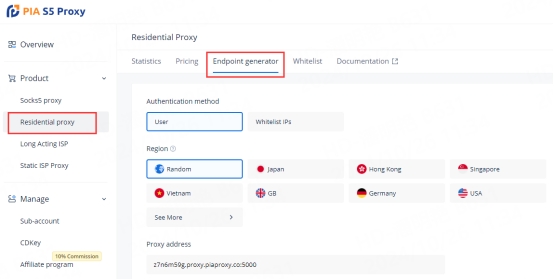
We support authentication of residential proxies by username and password or based on IP whitelist.
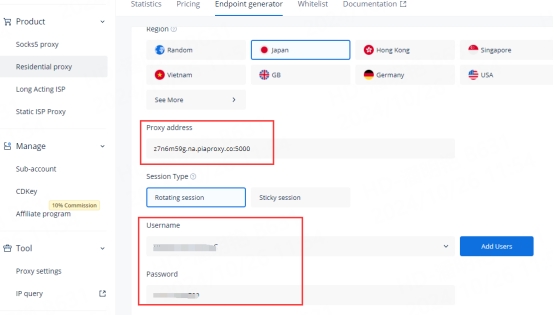
Username and password authentication: When you choose this authentication method, you need to fully fill in the obtained proxy address, subaccount username and password when configuring the proxy.
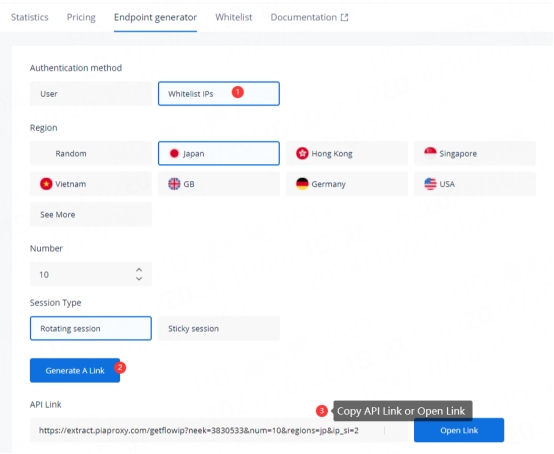
IP Whitelist: Select this verification method. When configuring the proxy, you can fill in the API link or get the IP address and port by opening the link.
Please select the authentication method, proxy region, session type, etc. according to your business needs. After that, you will see the generated list of available endpoints! Next, open the Dolphin{anty} application.
Dolphin{anty} Settings
1. Click the "New Profile" button in the home screen to enter the profile settings page.

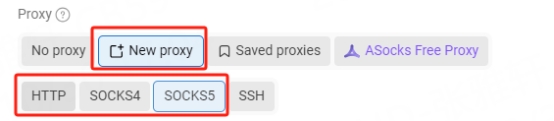
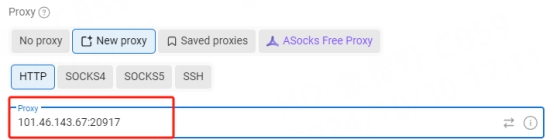
2. In the "Proxy" section, select "New Proxy" and select HTTPS, HTTP or Socks5 protocol
3. Fill in the proxy information
3.1 Username and Password Verification: Fill in the text fields of Proxy Host, Proxy Port, Proxy User and Proxy Password as shown below.
Proxy: Proxy Host: Proxy Port: Proxy Username: Proxy Password [Connect with English colon]

To set the username and password you use in the setup, please refer to this setup guide. Username and Password Verification.
3.2 IP Whitelist: Fill in the text fields of Proxy Host and Proxy Port as shown below
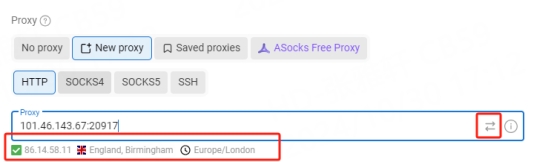
4. Click the "Check Proxy" button to check if the proxy is working properly
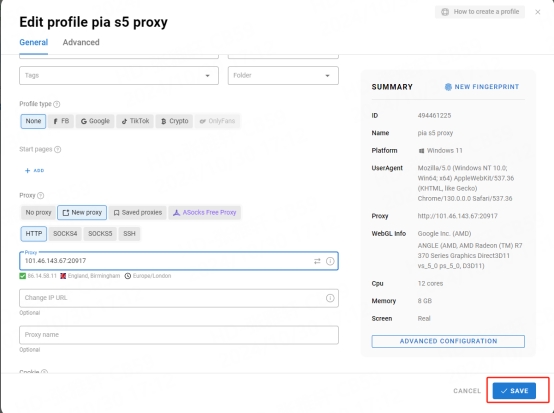
5. After the settings are completed, click the "OK" button at the bottom of the window to save the profile settings.
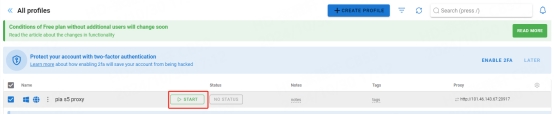
6. In the "Profile Management" tab, you will see the profile you created. Press the "Open" button to start the browser profile.
As an anti-fingerprint browser designed for multi-account management, Dolphin{anty} provides powerful privacy protection, environment isolation and team collaboration functions, which is very suitable for users who need secure and independent account operations. Try the comprehensive functions of Dolphin{anty} to improve work efficiency and privacy protection, making multi-account management easier and safer!
Last updated
Was this helpful?